


Introduction
Apache® Druid is a very successful open source project building a real-time analytics database that can query any scale of data with sub second response times. It enables interactive analytics capabilities on streaming and persisted data. It enables ad-hoc aggregation across large numbers of dimensions with full SQL aggregations and approximation algorithms for even faster performance.
Apache® Superset is another incredibly successful open source project building a data visualization and data exploration platform. Superset integrates well with a variety of data sources including Druid.
Why Superset + Druid?
Superset is popular for its ability to explore data, provide interactive dashboards and share insights with colleagues. There is a deep integration between Superset and Druid; Superset was born at AirBnB as a visualization tool for the slicing and dicing of data on Druid. It has since grown to support many more databases but it retains its tight conceptual integration with Druid. For both projects, data is described in terms of dimensions and metrics, and time is primary dimension. Both projects share a philosophy of extensibility and distributed architectures making them a good fit for high concurrency workloads on large volumes of data. Superset does not store data, it relies on the analytics capabilities of the databases it connects to. Superset takes analytic results and renders them quickly using one of the rich set of visualizations it provides. Druid provides the optimized and pre-indexed storage and query processing at any scale. Superset can additionally use a caching layer to prevent repeat queries on the database layer which makes it a good partner with Druid in the overall efficient use of compute resources across the stack.
In this article I’ll walk through setting them up using docker-compose, configuring a database connection and creating a first visualization on Superset that queries Druid. In subsequent articles we’ll explore how to set that up with authentication and authorization, and delve into best practices. For now let’s keep it simple.
Initial Setup
To set the stage and provide context, I’m working on a MacBook Pro (Intel i5), 16GB of RAM running macOS Monterey. I installed Docker and reconfigured Docker resources to:

Install SuperSet
Following these instructions from the Superset documentation, and after some trials and tribulations, I ended up with this set of commands for a Druid-ready Superset install using docker compose:
Clone superset repo and pull docker-compose dependencies:
git clone https://github.com/apache/superset.git
cd superset
docker compose -f docker-compose-non-dev.yml pull
We need both clusters to be visible on the same network, so I appended a networks section to the docker-compose-non-dev.yml file which sets the network to the same one that the Druid docker compose creates by default so that they can see each other using their corresponding service names:
echo "
networks:
   default:
     name: docker_default
" >> docker-compose-non-dev.yml
Then start superset with:
docker compose -f docker-compose-non-dev.yml upUse http://localhost:8088/ to access the SuperSet UI. The default credentials are:
user: admin / password: admin
Install Druid
Following these instructions from the Druid docker distribution readme, the commands are:
git clone https://github.com/apache/druid.git
cd druid
docker-compose -f distribution/docker/docker-compose.yml up
Use http://localhost:8888/ to access Druid Console UI.
Load Data
In order to test SuperSet access to Druid, I needed some data. I used one of the readily available sample datasets from the Query view by using “Connect external data”:

Then clicked “Example data” and selected “KoalasToTheMax one day (nested)”:

This results in a SQL REPLACE statement that is preconfigured to load all the fields in the sample source. This is also a great example of Apache Druid’s SQL Based Ingestion:

It took about 3 minutes to load after clicking on “Run”.
If you try this, look at line 7 of the generated SQL you’ll see the schema for the external file being ingested. The schema is a list of field objects with a name and type properties. Notice that, for some of the fields, it uses type COMPLEX<json> which is how Druid automatically ingests nested JSON objects. I love this functionality in Druid because it indexes all the fields inside the JSON objects and deals with dynamic schemas automatically. I’ll use some of the nested JSON fields when testing a Superset visualization to show how to query these fields.
So armed with data on Druid and Superset installed, I was ready to put everything together…
Hooking it up
I used the instructions I found on the Superset website. Here’s the end result:
Add a Database Connection to Druid
From Superset UI click on the Datasets tab.
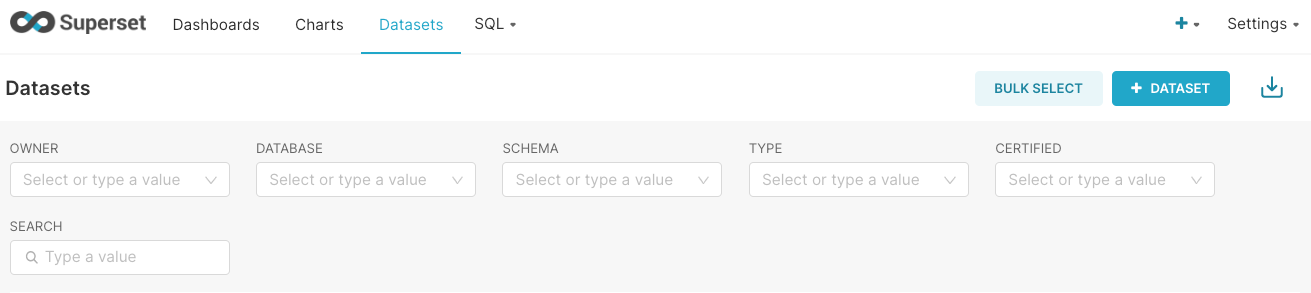
Click on the “+” dropdown at the top right and select Data/Connect a database.

I selected “Apache Druid” from in the SUPPORTED DATABASES dropdown. It asks for the SQLALCHEMY URI in the form:
druid://<User>:<password>@<Host>:<Port-default-9088>/druid/v2/sqlThe hostname should reference the Druid router service named “router” and the port it uses by default is 8888, so I used:

Make sure you test the connection, I ran into some network issues initially that were preventing access to Druid.
First Visualization
You can add a dataset to Superset directly as the Druid datasource or through a SQL query. Since I had to use custom SQL to access nested JSON fields, I ended up using a custom SQL dataset. Here’s the streamlined version of the process:

From SQL Lab view:
Click on “Add a new tab”,
Select “druid” as the database,
Select SCHEMA “druid”
Type the SQL:
SELECT "__time", "referrer", "session_length",
   JSON_VALUE("geo_ip", '$.continent') AS continent,
   JSON_VALUE("geo_ip", '$.country') AS country,
   JSON_VALUE("geo_ip", '$.region') AS region,
   JSON_VALUE("event", '$.type') AS event_type,
   JSON_VALUE("event", '$.percentage' RETURNING FLOAT) AS pct_clear,
   JSON_VALUE("event", '$.layer' RETURNING FLOAT) AS layer
FROM "druid"."kttm-nested-v2-2019-08-25"
The JSON_VALUE function is used to access nested fields in JSON columns. The function returns the value as a string by default, so for the metric columns use RETURNING FLOAT syntax to get Superset to recognize them as metrics.
Click on Save dropdown and select Save dataset, I named it “flattened_kttm_view”.

After saving, Superset takes you to the Add Chart view with the new dataset selected:
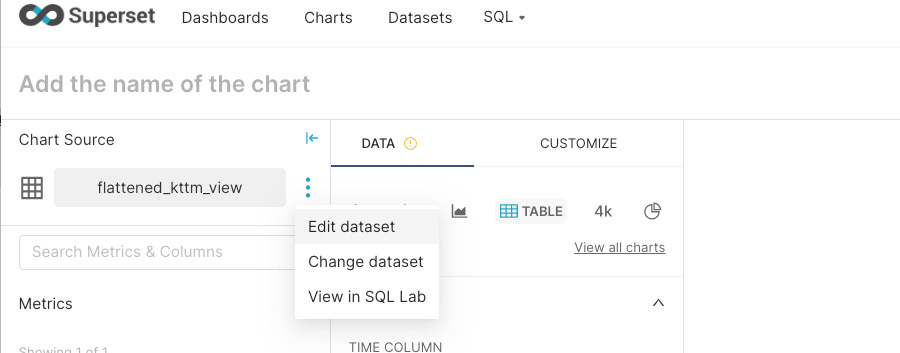
I had some initial problems with the __time column, Superset did not immediately recognize it as a temporal column. To fix this:
Click on “Edit Dataset”
In the COLUMNS tab, make sure the __time column is marked as “Is Temporal”:

Time to have some fun with visualizations, I created a simple website traffic pattern by time of day chart that ended up looking like this:
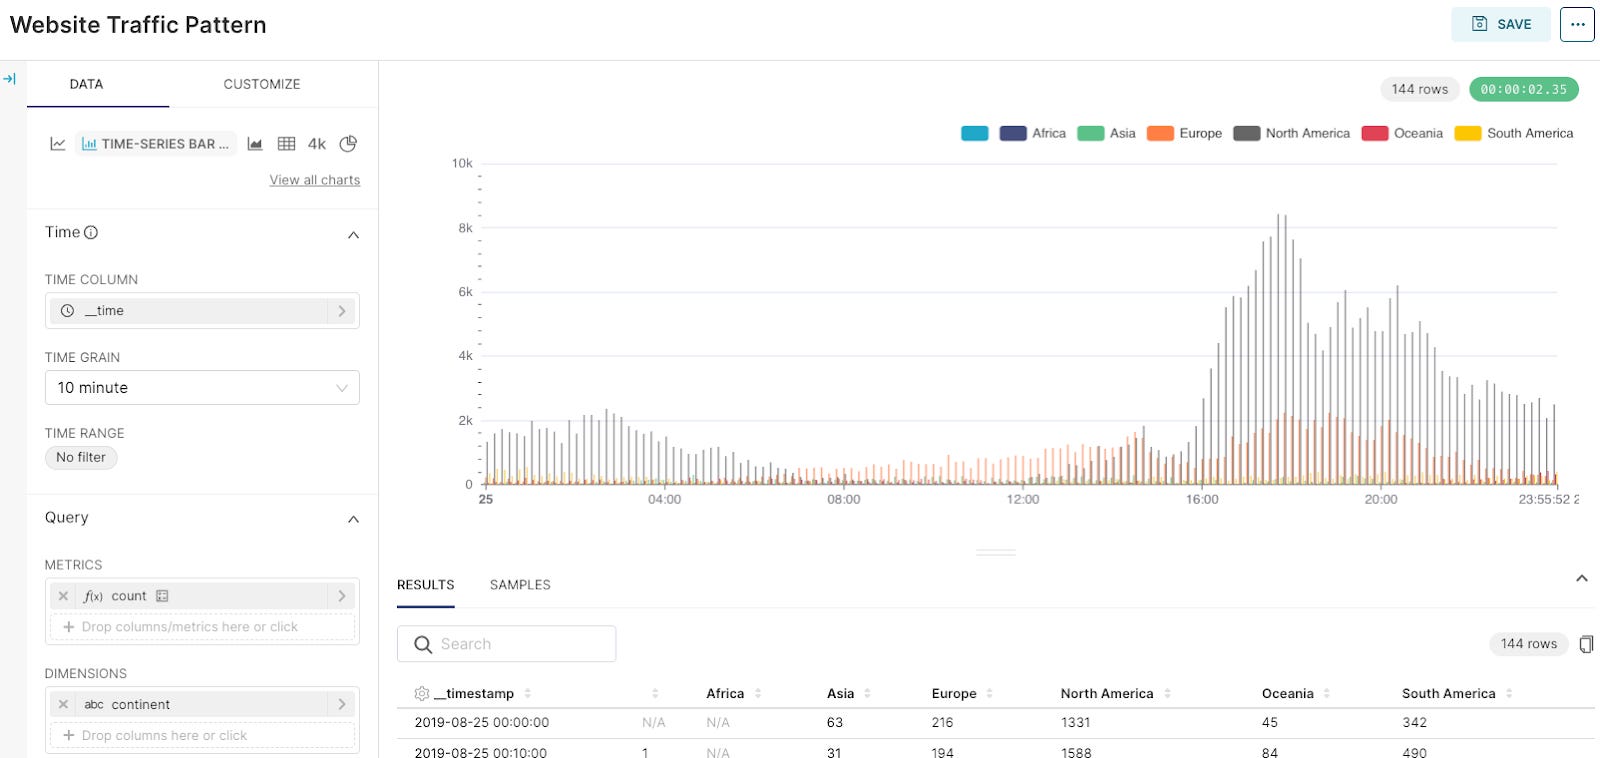
It was quite simple to create the visualization using a few clicks, and Superset has an impressive amount of visualization options.
Conclusion
Superset and Druid fit quite well together as an open source stack for highly performant data analytics applications. You can easily test their functionality on a small install such as this one. This is a good first step before venturing into a larger scale deployments of either technology. It’s great, however, to have the assurance that both will scale to deal with large data volumes, high concurrency and stringent SLAs as evidenced by their long list of impressive implementations.
If you want to learn more about Apache Druid and Apache Superset implementations, visit the Druid Powered By page and the Superset Users in the Wild page.
Troubleshooting
I’ve added a companion blog post that describes the problems I ran into while writing this blog post and how I solved them.
